
Water Heater Leaking? A Cedar Rapids Homeowner's Guide to What Happens Next
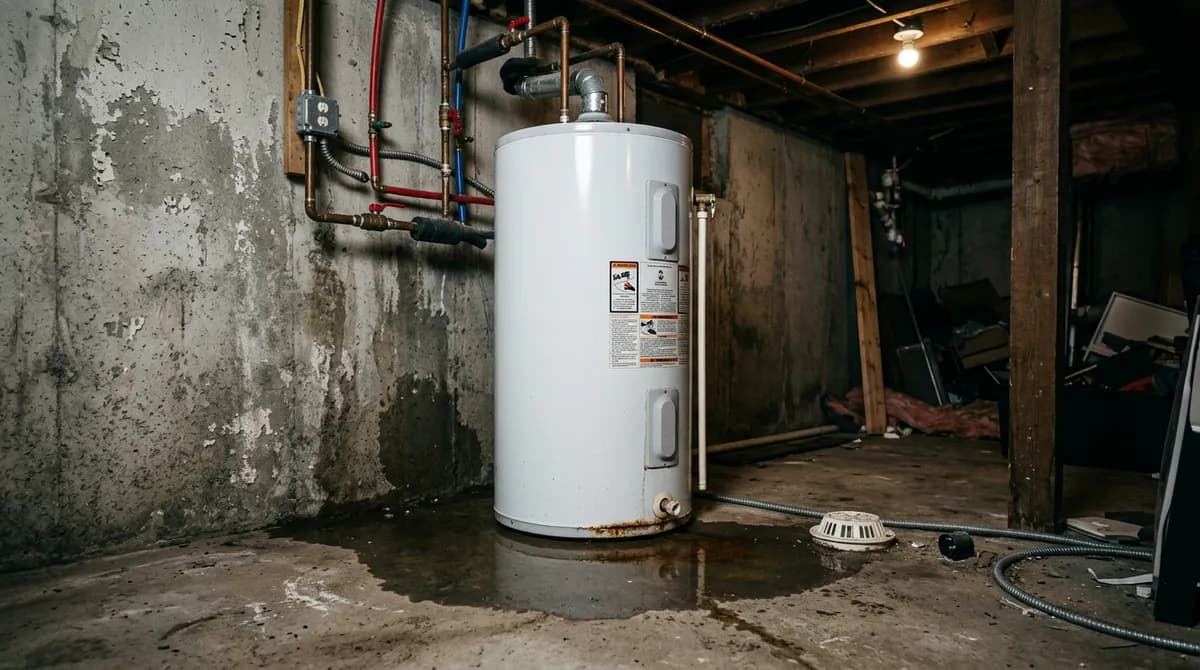
Of all the water damage calls we take across Cedar Rapids, water heater failures might be the most preventable — and the most predictable. The unit sits in a basement corner or a utility closet nobody looks at, quietly working for a decade, and then one week it starts to weep from a bottom seam. Nobody notices, because nobody checks. By the time someone spots the puddle, water has been wicking into the subfloor and the adjacent wall cavity for weeks.
This guide covers how to tell whether your water heater is actually leaking, how to read where the leak is coming from (it tells you how serious the problem is), the exact shutdown sequence during an active failure, and the short maintenance list that prevents most of these calls entirely.
First: Confirm It's Actually a Leak
Not every wet water heater is a failing water heater. Before assuming the worst, rule out the two common impostors:
- Condensation. A cold tank refilling in a humid Iowa basement can sweat enough to drip. Wipe the tank dry, wait an hour or two, and see if moisture returns evenly across the surface (condensation) or in a defined trickle from one point (leak).
- A neighbor appliance.Water travels along floors and pipes before it pools. A softener, a furnace humidifier line, or a nearby supply fitting can deposit water at the water heater's base. Trace the moisture to its highest, wettest point before blaming the tank.
If the trail leads back to the tank itself, the next question is where on the tank — because location determines whether you're facing a $30 part or a full replacement.
Where the Leak Is Tells You How Bad It Is
Top of the tank: usually fixable
The cold-water inlet, hot-water outlet, and their flexible connectors all live on top. These are threaded connections that loosen and corrode with age, and they're the cheapest, fastest repairs on the list. Caught early, a top-fitting leak is a plumbing service call, not a restoration job.
Temperature & pressure relief valve: pay attention
The T&P valve on the side or top of the tank is a safety device — it opens when pressure or temperature climbs too high. A T&P valve that drips occasionally may just be worn out, but one that discharges regularly is telling you the tank is over-pressurizing. That's not a “keep an eye on it” situation; over-pressure is how tanks rupture. Have it diagnosed promptly.
Drain valve: minor, but don't ignore it
The small spigot near the tank's base can weep after a flush or simply loosen over time. It's an inexpensive fix — but a steady drip a few inches off the floor is exactly the kind of slow leak that saturates a subfloor unnoticed.
Tank body or under the unit: the tank is done
Water seeping from the tank shell itself, or pooling from underneath with no other source, means the internal glass lining has failed and the steel tank is corroding through. There is no repair for this — the unit needs replacement, and until it's replaced it can go from a slow weep to a full-volume release at any time. Treat a bottom-seam leak as a replacement deadline, not a maintenance item.
Active Leak? The 5-Step Shutdown Sequence
- Close the cold-water inlet valveon the pipe entering the top of the tank. If it's seized or you can't reach it, use the home's main shutoff — in most Cedar Rapids basements it's near the front foundation wall where the city service enters.
- Kill the energy source.Electric: flip the unit's dedicated breaker. Gas: turn the control knob to “off.” Never leave elements heating a draining tank, and never stand in water to do either — if water has reached electrical equipment, cut power at the panel first.
- Move belongings out of the water's path. Utility areas double as storage in most homes, and cardboard boxes on concrete are always the first casualties. Water will keep spreading for hours after the source stops.
- Document everything before cleanup. Photograph the unit (including its data plate with the manufacture date), the leak point, the wet flooring, and every affected item. This is the backbone of your insurance claim.
- Extract what you safely can. A wet-vac and towels are fine for a few gallons on sealed concrete. If water has reached finished flooring, drywall, carpet, or has been sitting more than a few hours, professional extraction and metered drying is where the real savings are — surface-dry is not the same as dry.
Why a 50-Gallon Tank Causes 500 Gallons of Damage
The tank's capacity is only the opening number. As long as the cold-water inlet stays open, the tank keeps refilling and feeding the leak — a rupture that runs overnight or over a workday can push hundreds of gallons through a basement. And the installation location works against you three ways:
- It's where you don't look. Slow leaks in living spaces get noticed in days. Slow leaks in utility rooms get noticed when the ceiling below stains or the musty smell starts.
- It's next to what water ruins quietly. Subfloor, sill plates, framing, insulation, and the back of finished basement walls — materials that fail from saturation you can't see, then grow mold within 24-48 hours of getting wet.
- It fails when nobody's home.Water heater ruptures are a classic “came home to a wet basement” event. Our basement water damage page covers what recovery looks like when a failure has had hours to spread.
The Cedar Rapids Factor: Sediment and Aging Units
Two local patterns show up again and again in the water heater failures we work:
Mineral sediment.Cedar Rapids' municipal water carries enough dissolved mineral content that an unflushed tank builds a sediment layer on its floor within a few years. That layer traps heat against the tank bottom, stresses the glass lining, and announces itself as popping or rumbling when the burner or elements run. Sediment is why the “flush annually” advice isn't generic filler here — it directly targets the most common local failure mode.
Original equipment aging out. Large tracts of Cedar Rapids, Marion, and Hiawatha housing were built or remodeled in waves, which means water heaters age out in waves too. A tank installed when a home was built in 2012 is now living on borrowed time. In older Cedar Rapids homes, the risk compounds: an aging tank often sits on the same floor as original galvanized supply plumbing, so a single utility room can hold the house's two most likely failure points.
What Professional Cleanup Involves
If the water got past sealed concrete — into finished flooring, drywall, carpet, or framing — the restoration sequence looks like this:
- Moisture mapping with meters and thermal imaging to find everything the water touched, not just what's visibly wet
- Extraction of standing water and saturated carpet pad
- Removal of unsalvageable wet drywall and insulation
- Antimicrobial treatment where water sat for hours
- Air movers and LGR dehumidifiers running 3-7 days
- Daily moisture readings against the IICRC S500 dry standard before anything gets rebuilt
The full process is detailed on our water damage cleanup and structural drying pages. The short version: the visible puddle is the easy part; the moisture reading inside the wall cavity is what determines whether you get mold six weeks later.
The 20-Minute-a-Year Prevention List
- Flush the tank once a year to clear sediment — the single highest-value task on this list.
- Test the T&P valve annually (lift the lever briefly; it should discharge and reseal) and have it replaced if it drips afterward.
- Check the anode rod every 3-5 years. It's a sacrificial part that corrodes so the tank doesn't — a $30-50 rod routinely buys years of extra tank life.
- Put a drain pan under the unit with a line routed to a floor drain, so a slow leak has somewhere to go besides the subfloor.
- Set a leak sensor at the base. A battery-powered water alarm costs less than a pizza and turns a three-week silent leak into one you catch within hours. Smart versions send phone alerts — worth it if you travel.
- Know the unit's age.The manufacture date is coded on the data plate. Past 10 years, budget for replacement; past 12, you're choosing the failure date or letting the tank choose it.
The Expensive Failures Are the Quiet Ones
A dramatic rupture is actually the better outcome in one narrow sense: you find out immediately. The failures that turn into five-figure restoration jobs are the slow ones — a drain-valve drip or bottom-seam weep that runs for weeks, saturates the structure around it, and gets discovered only when the mold smell arrives. If your tank is past its rated life or showing any warning sign above, deal with it on your schedule. And if you're standing in the aftermath right now, the shutdown sequence above stops the bleeding — then get drying started before the 24-48 hour mold clock runs out.